osTicket - Setup, Prerequisites and Installation

This tutorial provides a step-by-step guide to installing osTicket and its necessary dependencies, including IIS, PHP, MySQL, and related extensions, ensuring a smooth setup and configuration process.
Environments and Technologies Used
- VMWare Workstation / Microsoft Azure / Amazon Web Services
- Internet Information Services
- Remote Desktop (if using Microsoft Azure)
Operating Systems Used
List of Prerequisites
- Virtual Machine/Provisioned Machine
- Administrator Privileges
- Internet Connectivity
Installation Steps
This step-by-step guide can be accomplished in various environments, such as a local setup through VMWare Workstation or through a cloud provider like Microsoft Azure or AWS. Regardless of which setup you choose, it is essential to provision a Windows machine with internet connectivity and Administrator Privileges.
For our first step within our Virtual Machine it is necessary to install Internet Information Services, for it will serve as the web server that will manage the HTTP requests while also providing a platform to run PHP - the language osTicket is built with. It ensures compatibility with other Microsoft technologies, offers robust performance, reliability, and essential security features, making it a suitable choice for running the osTicket application efficiently.
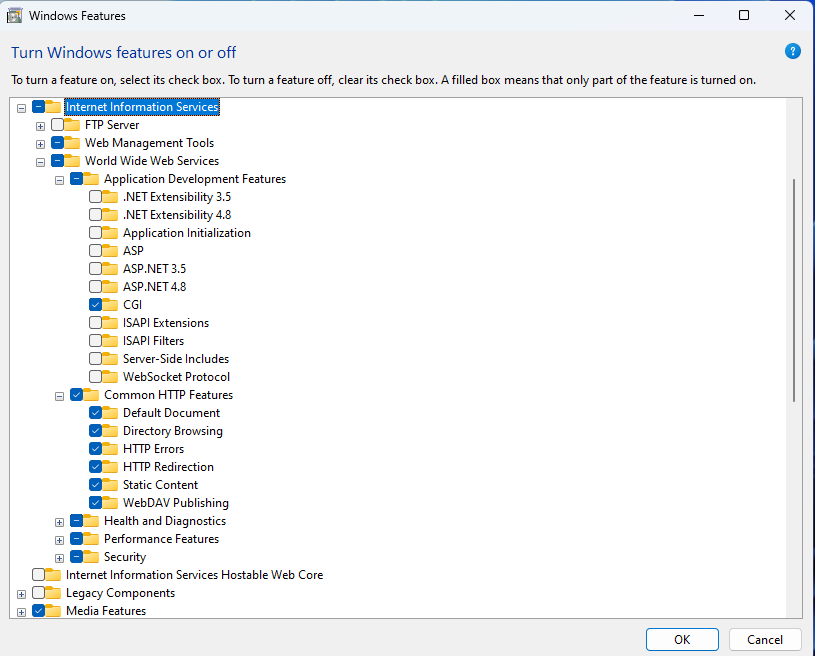
To install, we must access the Windows Features. This can be done by searching for “Windows Features” in the search bar, which will produce “Turn Windows features on or off.” After clicking this option we must enable a few key features: The parent directory Internet Information Services (which will auto select some features), CGI (under Application Development Features), and Common HTTP Features:
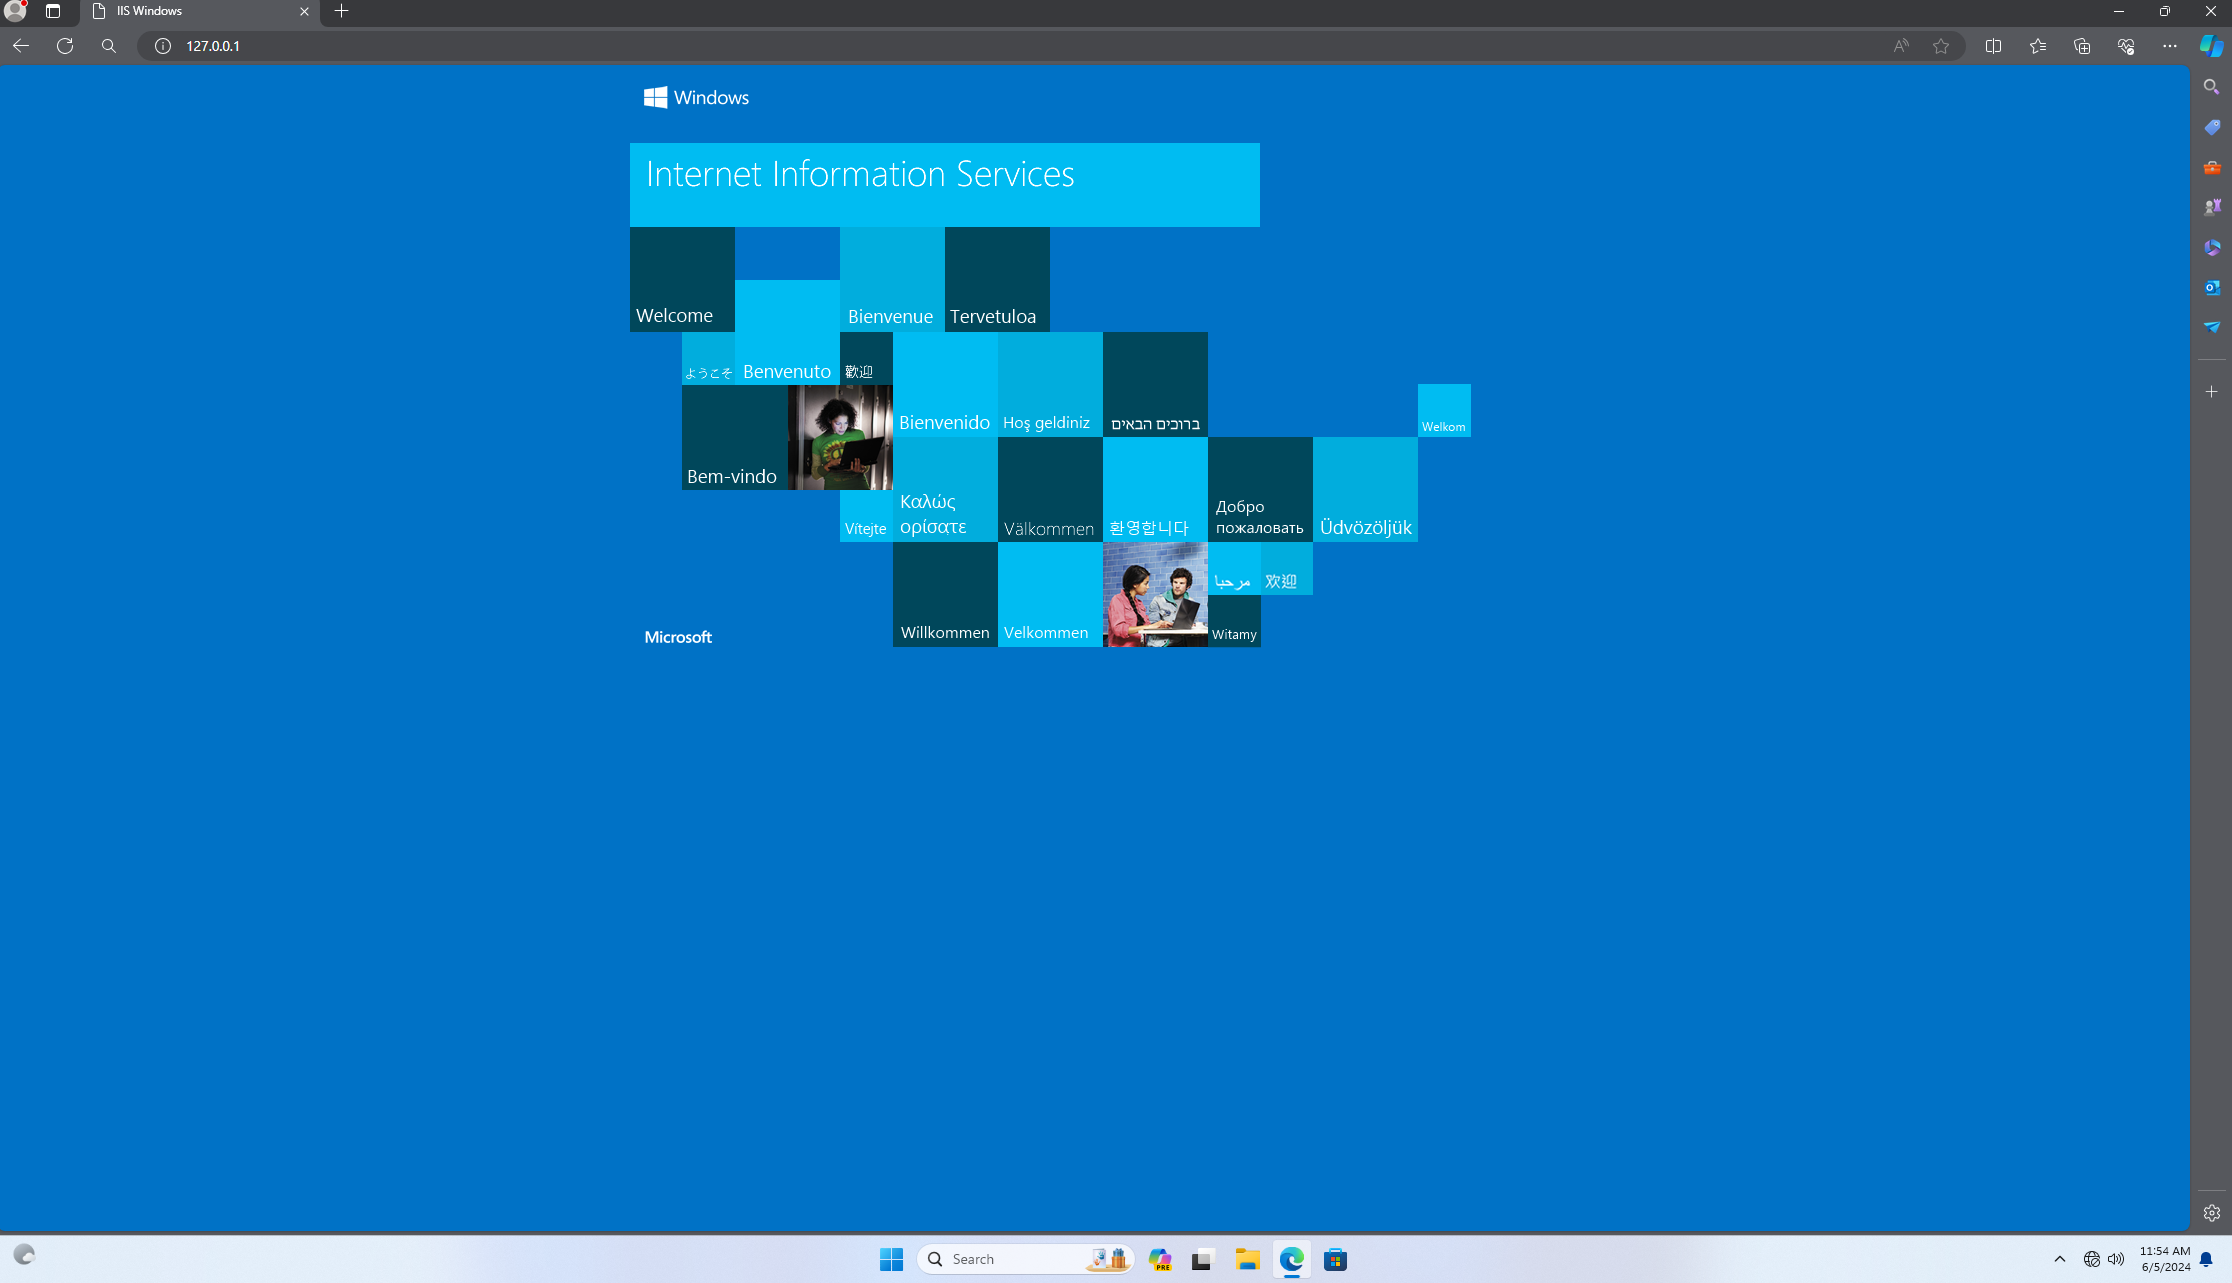
Once this has been done click OK and wait for the installation to finish. To verify proper installation we can open a browser and enter 127.0.0.1. The following page should be displaying:
Afterwards, we can begin to install some needed dependencies:
- [PHP Manager for IIS](https://drive.google.com/file/d/1RHsNd4eWIOwaNpj3JW4vzzmzNUH86wY_/view): A tool to manage and configure multiple PHP installations on IIS
- [Rewrite Module](https://drive.google.com/file/d/1tIK9GZBKj1JyUP87eewxgdNqn9pZmVmY/view): An IIS feature that allows URL rewriting for better SEO and user-friendly URLs
- PHP: The scripting language used by osTicket to execute server-side operations.
- This download link will provide a Zip file, which must be unzipped into a created PHP directory within the C Drive
- VC Redis: A Visual C++ Redistributable package required for running PHP applications
- Note that this installation may not be needed on newer Windows versions
- MySQL: A relational database management system used by osTicket to store and manage data.
- After installation, further configuration must be performed
- Standard configuration will work fine for our purposes, where we will install the server as a Windows Service
- Next we must configure the Security Settings by setting a root password
- Finally, we execute the installation
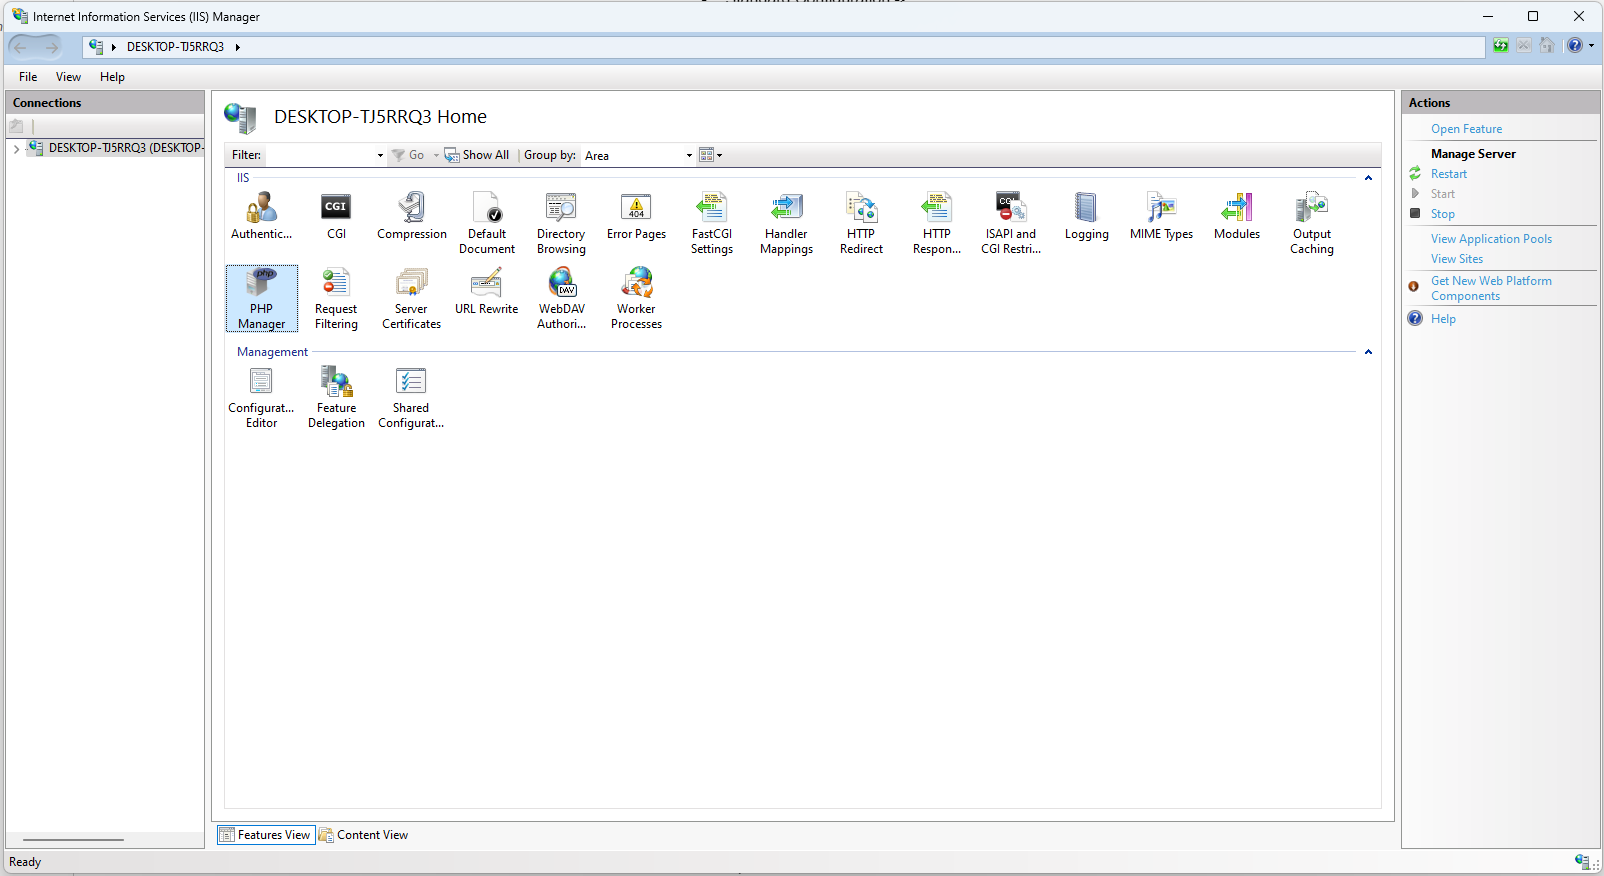
Once these dependencies have been taken care of we can configure our IIS through the ISS Manager, which can be found by searching for it via the search bar. Once ISS Manager has opened, we should be able to find the PHP Manager we installed previously:
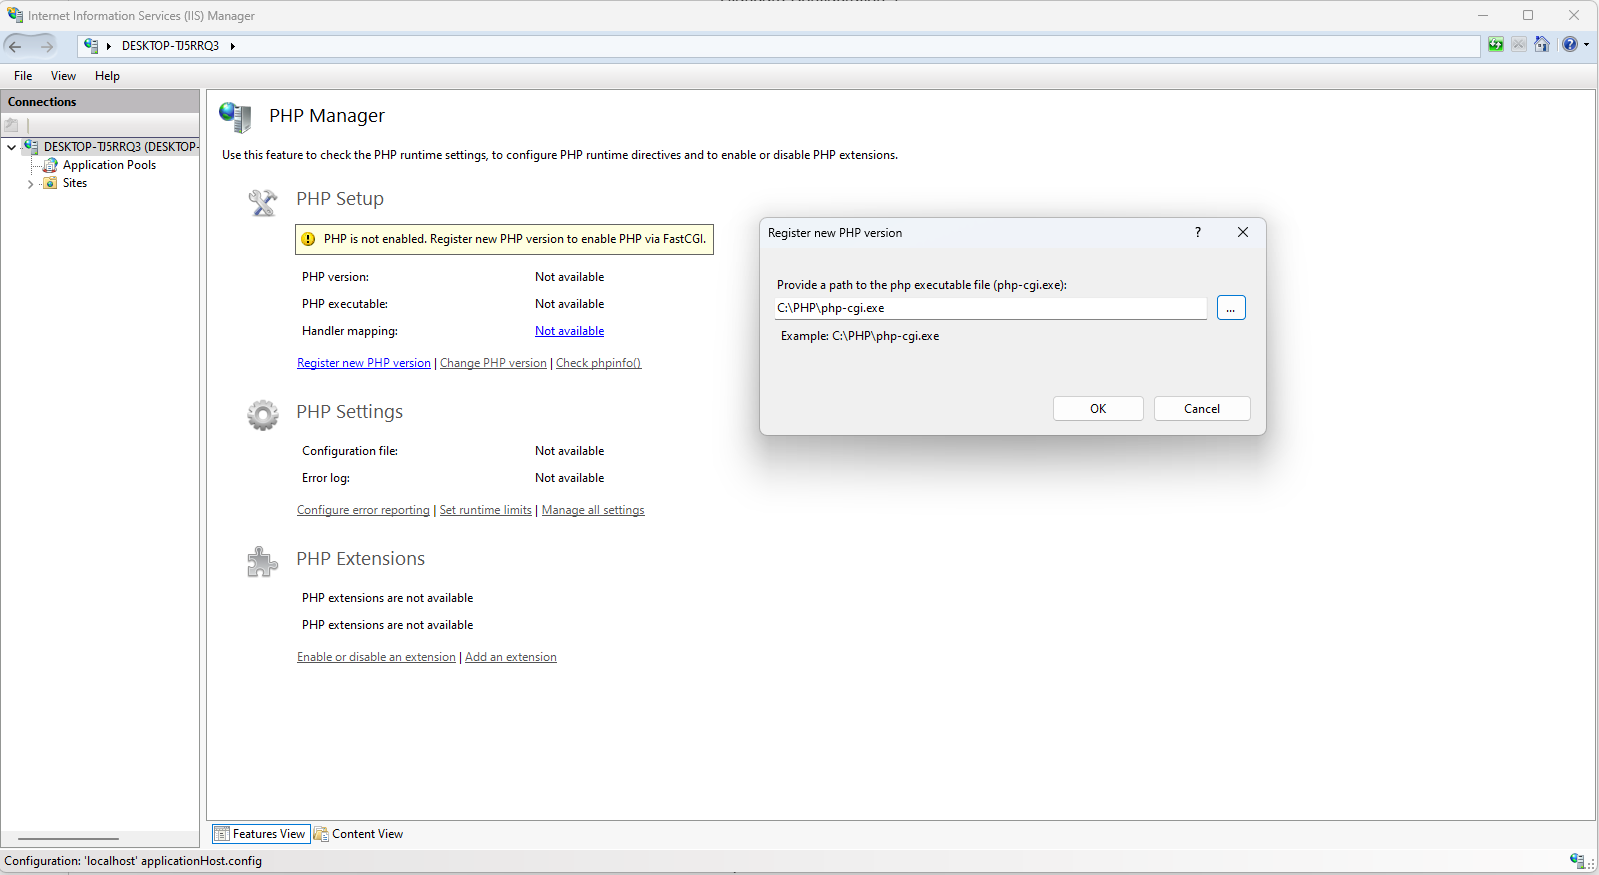
After we click into the PHP Manager we will find that it is not enabled until we register a new PHP version. This can be done by clicking the Register new PHP version button, which will prompt us to find the PHP files we unzipped previously:
Now that we have registered the new PHP version we can restart the server from the main IIS Manager page on the right hand pane:
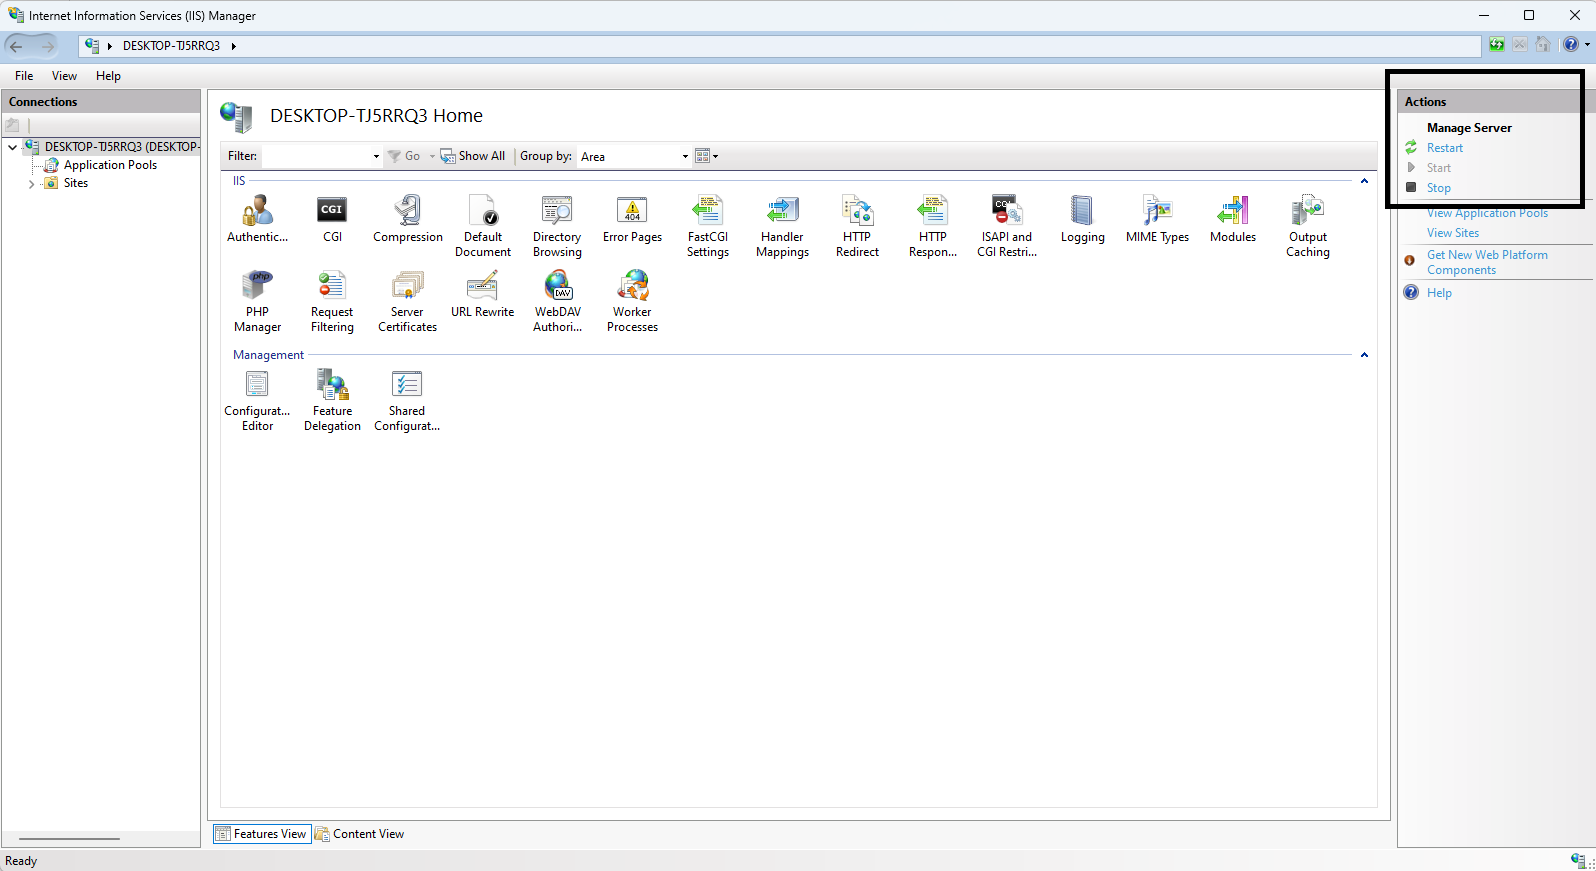
This will enable us to continue installing and setting up a few more crucial programs, starting with osTicket:
- osTicket: Open-source support ticket system used for managing customer service and support requests
- This download will be in a Zip file which can be extracted
- Once extracted, we can move the upload folder to C:\inetpub\wwwroot
- Rename the upload folder to osTicket
- Restart server from the main IIS Manager page on the right hand pane
- To confirm proper installation, open a browser and navigate to localhost/osTicket/setup
-
Your screen should look like the following:
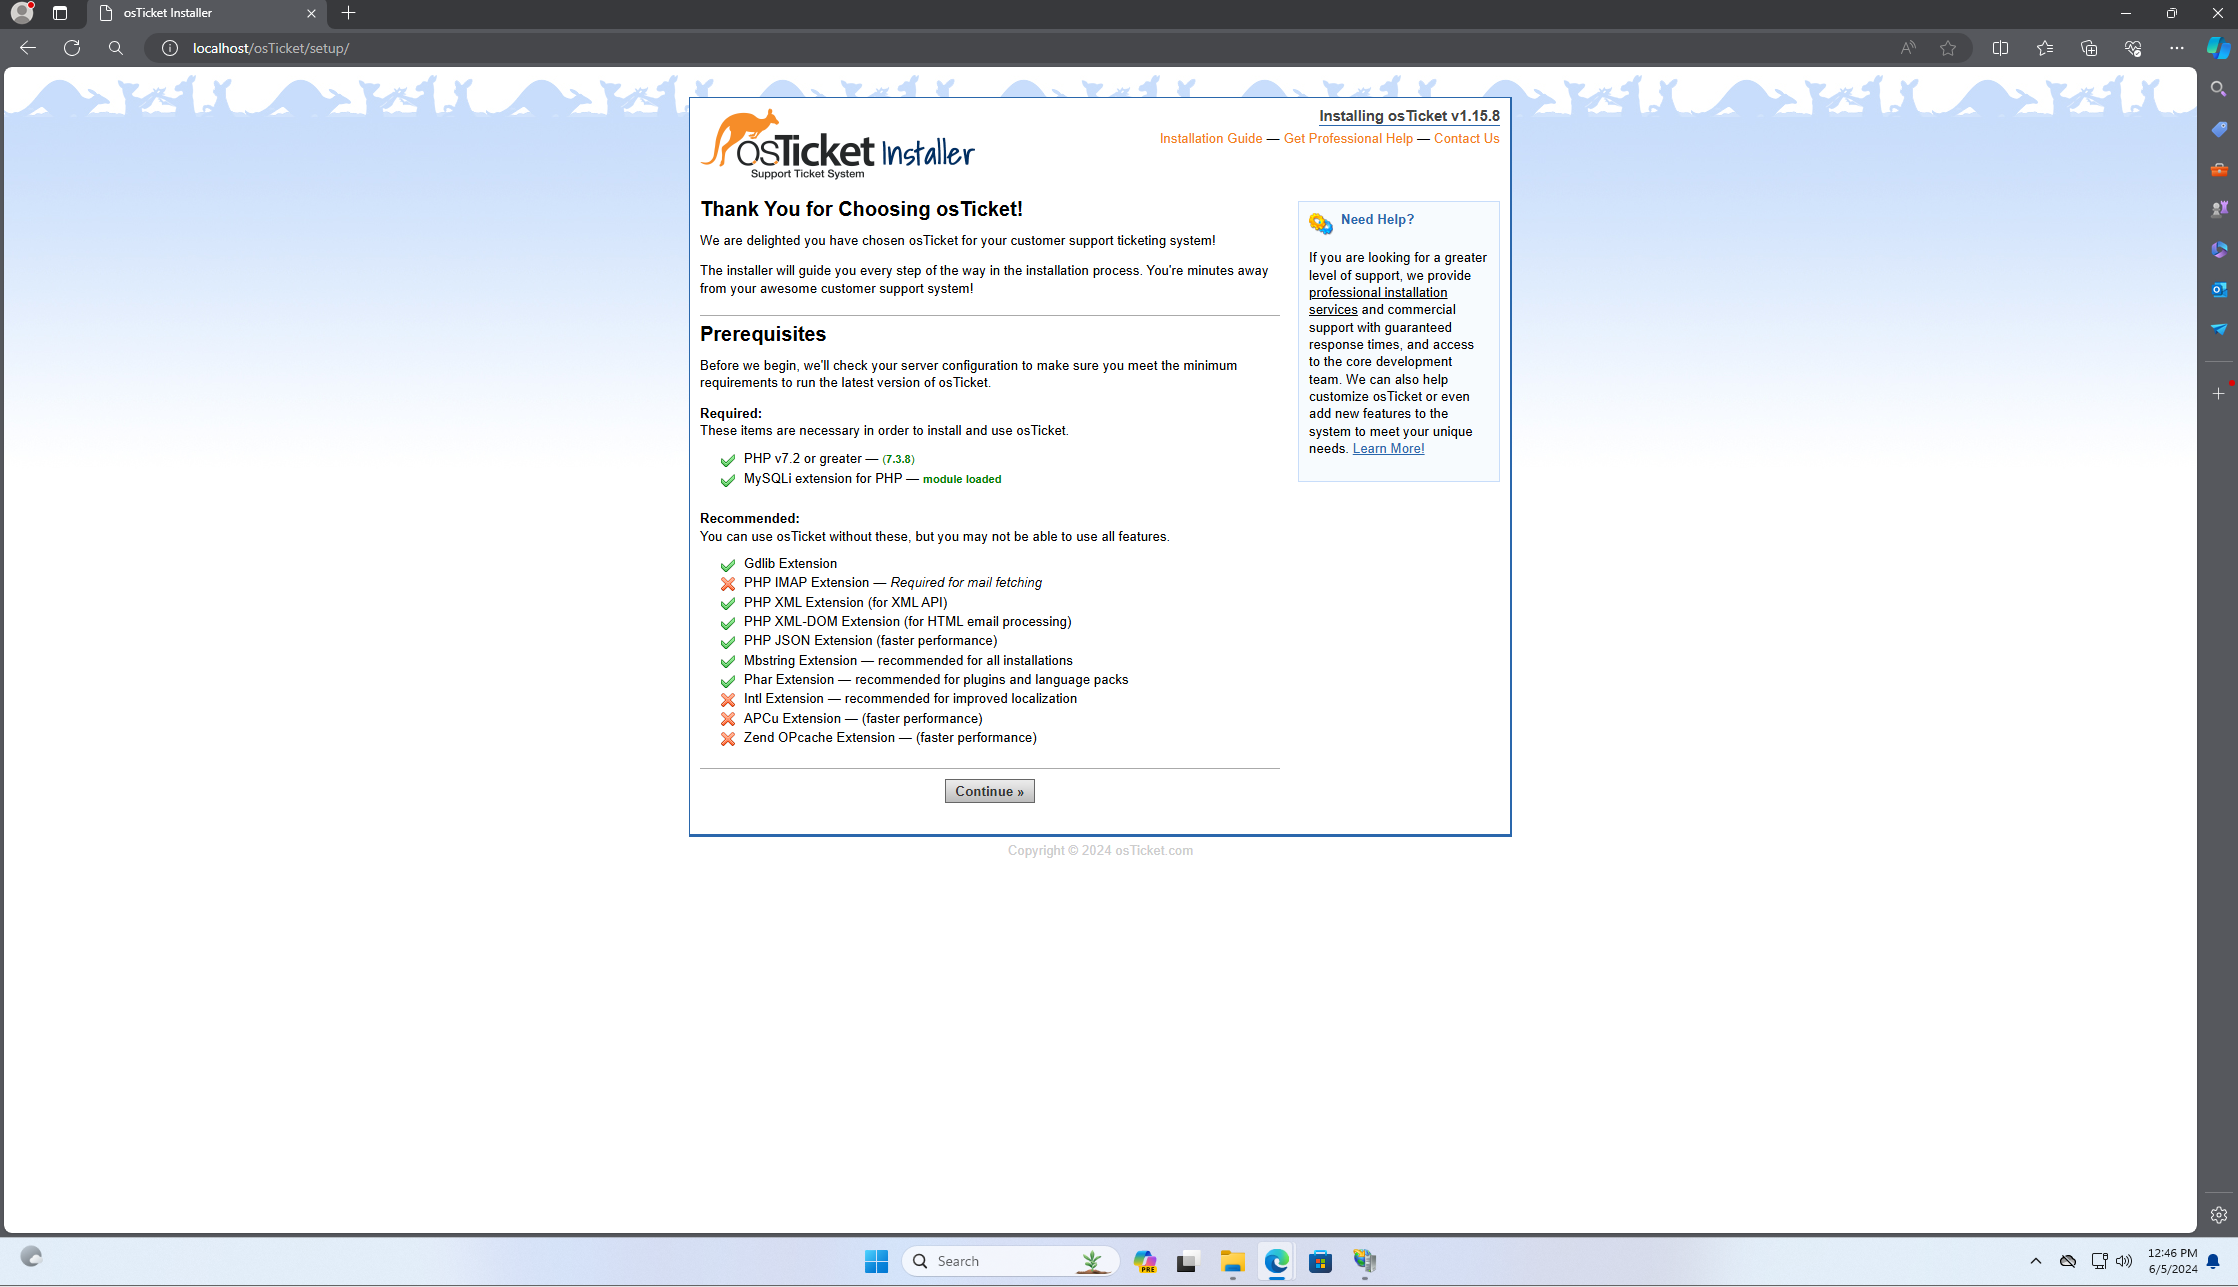
As you can probably note, there are various features that are not currently enabled. We can enable these from the IIS manager, where we must select the appropriate site in the left hand pane:
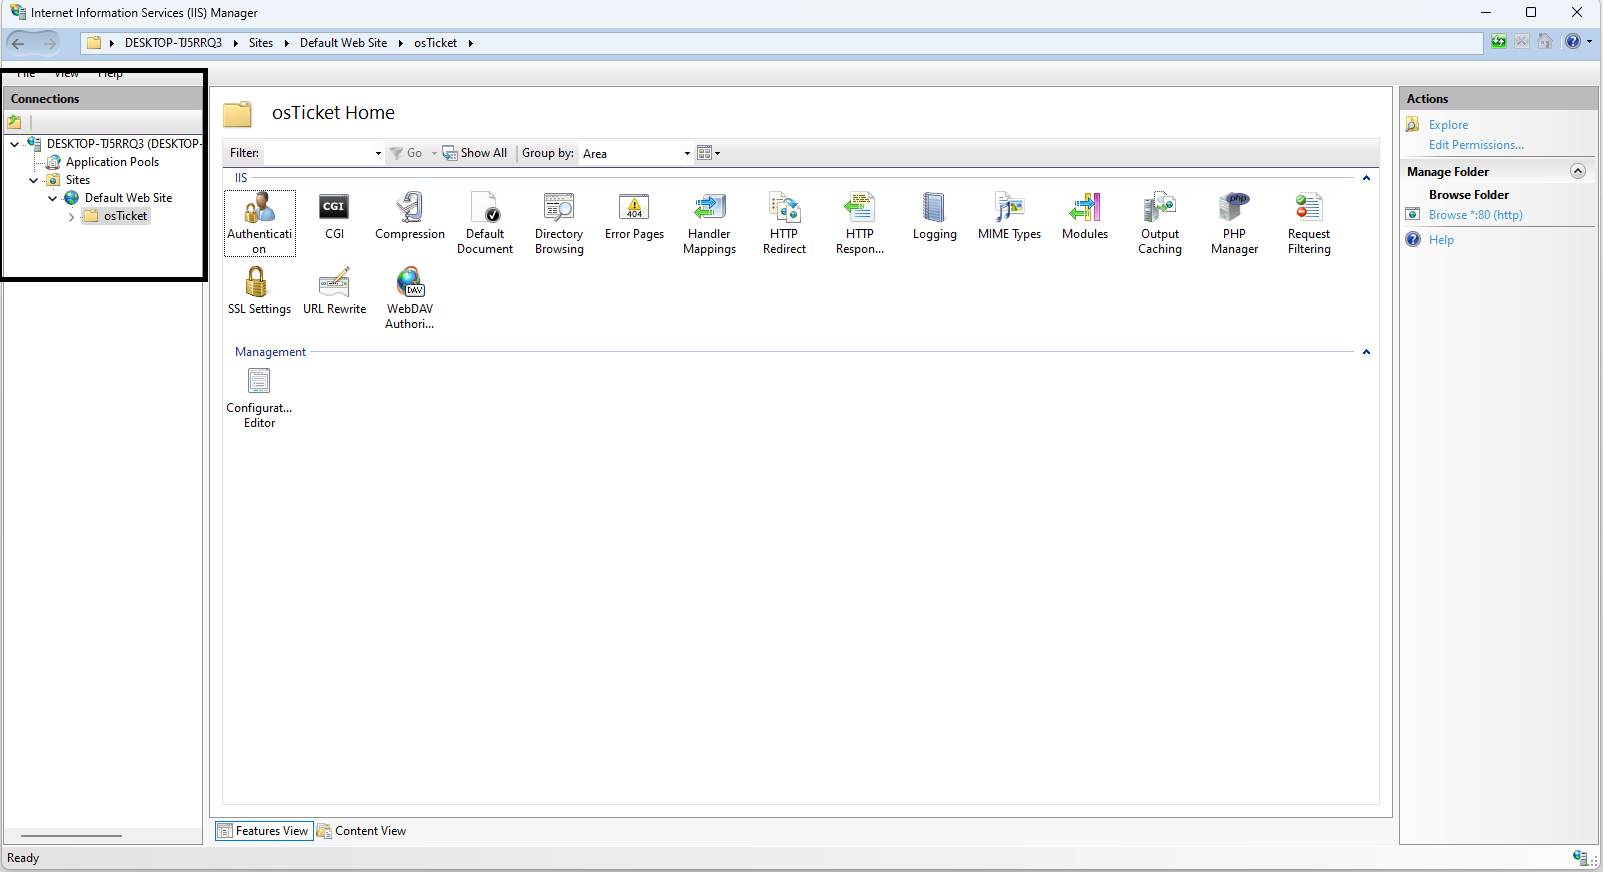
From here, we can select the PHP Manager, where under PHP Extensions we can see an option to Enable or disable an extension. After clicking this button, we must enable the following and then refresh the osTicket site in your browser:
- php_imap.dll: A PHP extension enabling IMAP email functions for handling email retrieval and processing.
- php_intl.dll: A PHP extension providing internationalization functions for formatting and handling international text, dates, numbers, and currencies.
- php_opcache.dll: A PHP extension that improves performance by caching precompiled script bytecode in memory.
Once we have confirmed the feature addition, we must rename a configuration file within our osTicket files:
- C:\inetpub\wwwroot\osTicket\include**ost-sampleconfig.php**
- C:\inetpub\wwwroot\osTicket\include**ost-config.php**
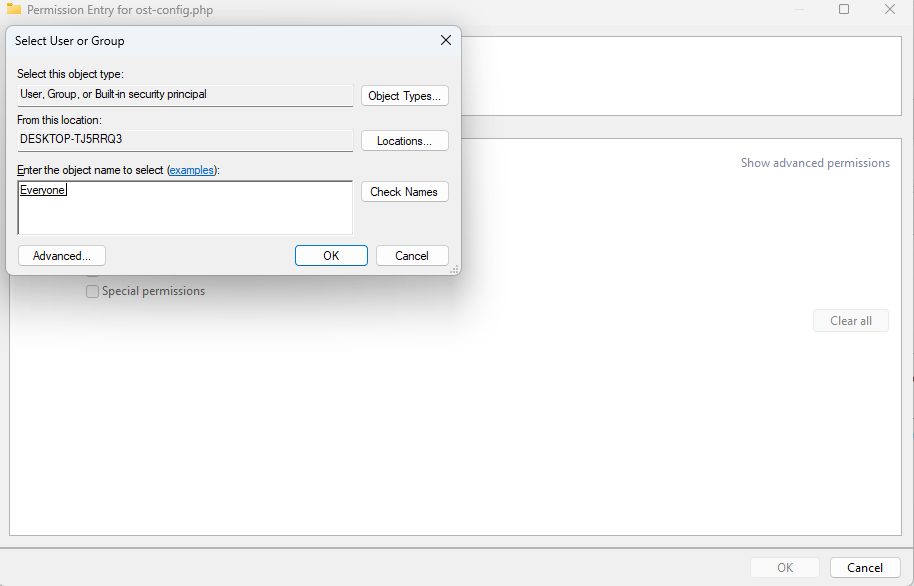
After the rename, we must change the permissions on this same configuration file by right-clicking and accessing the properties pane. Then we can select the security tab, where we can select the Advanced button at the bottom of the tab. This will open a separate window that allows us to change permissions:

We can then click on the Change permissions button, where we can Disable inheritance, and then Add some permissions. When we click the Add button, a new windows will allow us to Select a principal, where we can give permissions to everyone, and consequently grant them Full control after creating the user:
Now we can finish installing one last dependency before continuing the osTicket installation:
- HeidiSQL: Database management tool for browsing and managing MySQL databases, useful for interacting with the osTicket database
- Install with default configurations and launch HeidiSQL once it finishes installing
- You might get a pop up noting some changes to the tool, we can simply click Skip
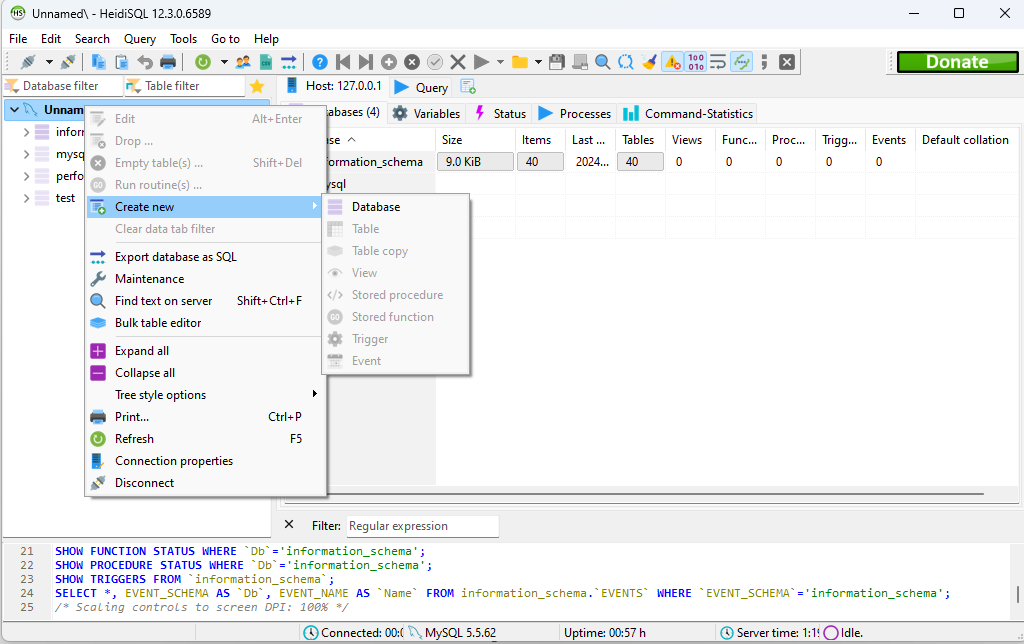
- On the bottom left, click the New button to create a new connection to the database
- Next we simply add the password we used for root during the MySQL installation and hit Open
- Now we right click the Unnamed list and create a new Database named osTicket:
- Install with default configurations and launch HeidiSQL once it finishes installing
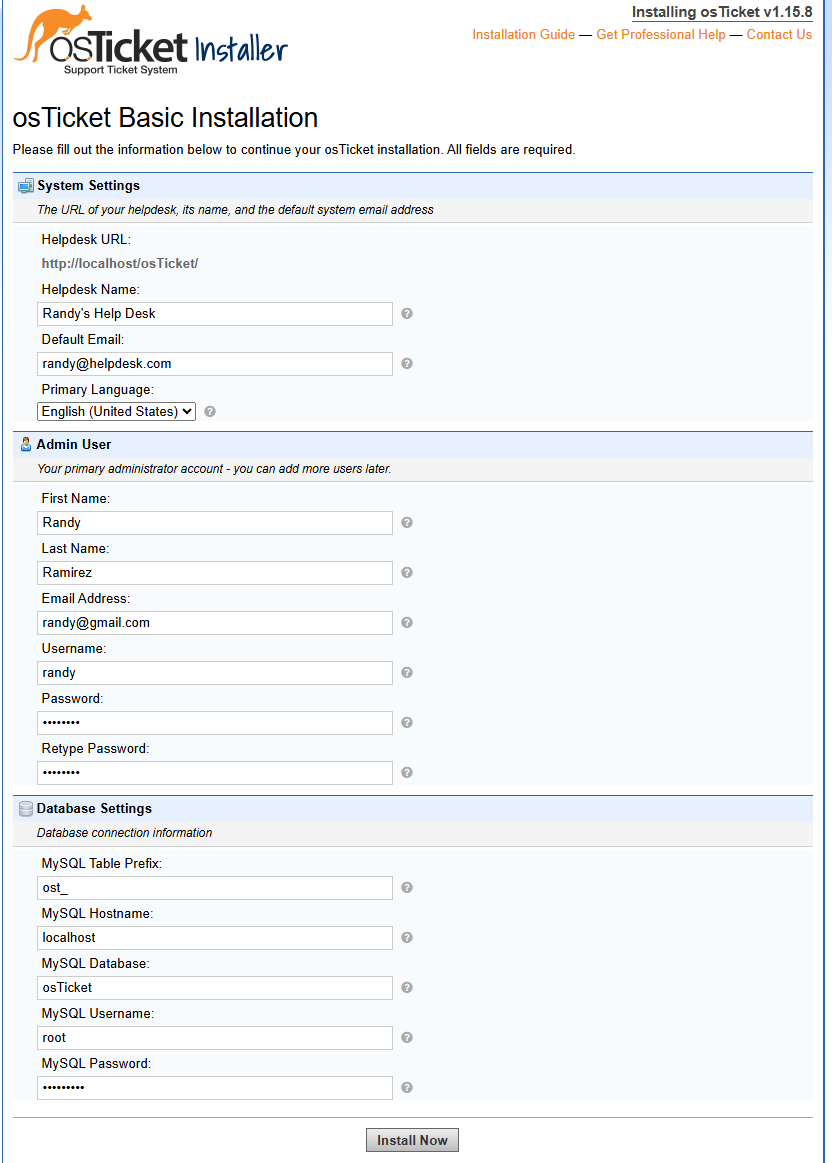
Once HeidiSQL has been setup, we can continue the osTicket installation through the browser, where we will setup some credentials, such as the Helpdesk Name, the Default Email, and admin user. It also important to setup the Database Settings from the HeidiSQL database we just created. Note your credentials for future use and click Install Now:
Afterwards, we can perform a bit of cleanup on our files:
- Delete the folder setup within C:\inetpub\wwwroot\osTicket
- Change permission on ost-config.php within C:\inetpub\wwwroot\osTicket\include to read only
Congrats! The osTicket login page should now be accessible at http://localhost/osTicket/scp/login.php , where you can use the appropriate credentials to login. Feel free to explore your new osTicket platform, or if you prefer a more guided experience, check out my Post-Install Configuration guide!