Configuring On-Premises Active Directory Deployed Locally

This tutorial provides step-by-step instructions for configuring Active Directory on a locally deployed server, enabling centralized management of users, groups, and resources within a network.
Environments and Technologies Used
- VMWare Workstation
- Active Directory Domain Services
- PowerShell
Operating Systems Used
- Windows Server 2022
- Windows 11 Pro
High-Level Deployment and Configuration Steps
- VMWare Workstation Virtual Machine Setup
- Active Directory Installation
- Joining Windows 11 Pro VM to Domain
- Create Users Via Active Directory
Deployment and Configuration Steps
To configure Active Directory using a setup of two virtual machines, you can use one VM running Windows Server 2022 and another VM with Windows 11 Pro. The Windows Server 2022 VM will serve as the domain controller, managing the network’s user accounts and security policies, while the Windows 11 Pro VM will be a client machine joined to the domain. This configuration can also be replicated in cloud environments such as Azure, AWS, or any other cloud provider, offering flexibility and scalability for your Active Directory setup. For our purposes, we will be focusing on a local setup through the use of VMWare Workstation. By following this approach, you can efficiently manage your network infrastructure either on-premises or in the cloud.
VMWare Workstation Virtual Machine Setup
VMware Workstation provides a powerful and versatile platform for deploying virtual machines, making it an ideal tool for setting up and configuring Active Directory. By using VMware Workstation, you can create and manage the Windows Server 2022 and Windows 11 Pro VMs on a single physical machine, simulating a network environment for testing and development purposes. This setup facilitates easy snapshots, cloning, and resource allocation, allowing for efficient deployment and management of your Active Directory infrastructure.
In order to deploy these two environments, we must download both the Windows 11 ISO and the Windows Server 2022 ISO. Then we can build both virtual machines through VMWare’s Virtual Machine Wizard which will guide you. Regardless, the installation for these versions of Windows will be more or less the same.
The wizard options for is as follows:
- Select Typical configuration
- Install the OS later
- Choose appropriate OS/Version for each machine
- For Windows Server 2022: Microsoft Windows / Windows Server 2022
- For Windows 11: Microsoft Windows / Windows 11 x64
- Name the virtual machine and select the location (During Windows 11 installation this may prompt a page to encrypt the machine: Please do so.)
- Specify Disk Capacity
- I recommend at least 60GBs
- Split virtual disk into multiple files
- Customize hardware
- To improve VM responsiveness and speed I recommend
- Memory: At least 8 GBs
- Processors: At least 4 processors with 1 core per processor
- New CD/DVD (SATA) - Set to Use ISO image file
- Choose the correct ISO file
- To improve VM responsiveness and speed I recommend
This will create a new Virtual Machine, but it is still not ready. To continue installation, we can right click the newly create Virtual Machine, choose Power, and then Power On to Firmware. Next we follow these steps:
- Select EFI VMware Virtual SATA CDROM Drive (1.0) and hit Enter
- Press any key to boot from selected ISO
- Install Windows normally:
- Select Languages
- Select Operating System Version
- For Windows Server 2022: Choose any option that includes Desktop Experience
- For Windows 11: Choose Windows 11 Pro
- Select custom installation: Choose hard drive
- Once installation has completed, create proper credentials
One optional installation that you can add to both Virtual Machines is VMWare Tools, which enhances the performance and manageability of virtual machines by providing improved graphics, network drivers, and seamless integration features like clipboard sharing and drag-and-drop functionality. This can be done by right-clicking the corresponding virtual machine, and selecting Install VMware Tools and following the installation wizard.
Active Directory Installation
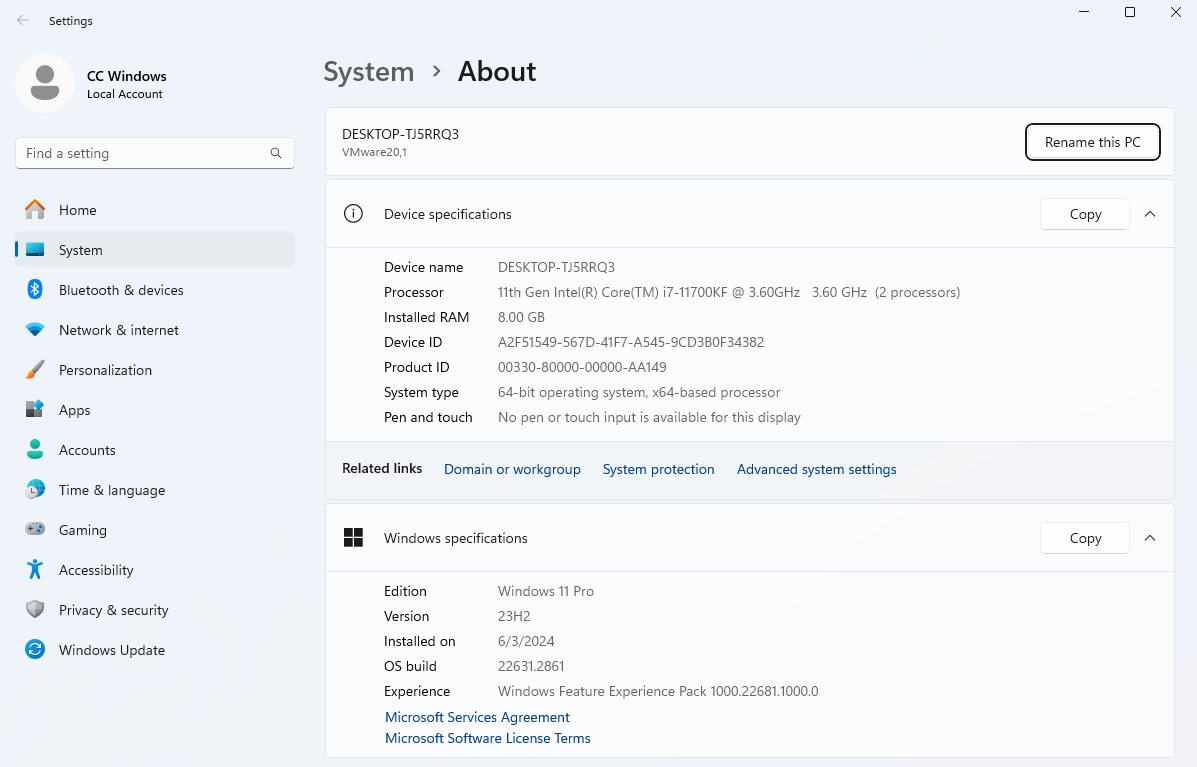
With Windows Server 2022 installed and operational, we can sign into the virtual machine with the appropriate credentials. Before we move any further I would recommend changing the name of the machine, as this can help keep the environment better organized. To do so, use the search function to look for View your PC name. This will lead to an about page with an option to Rename this PC:
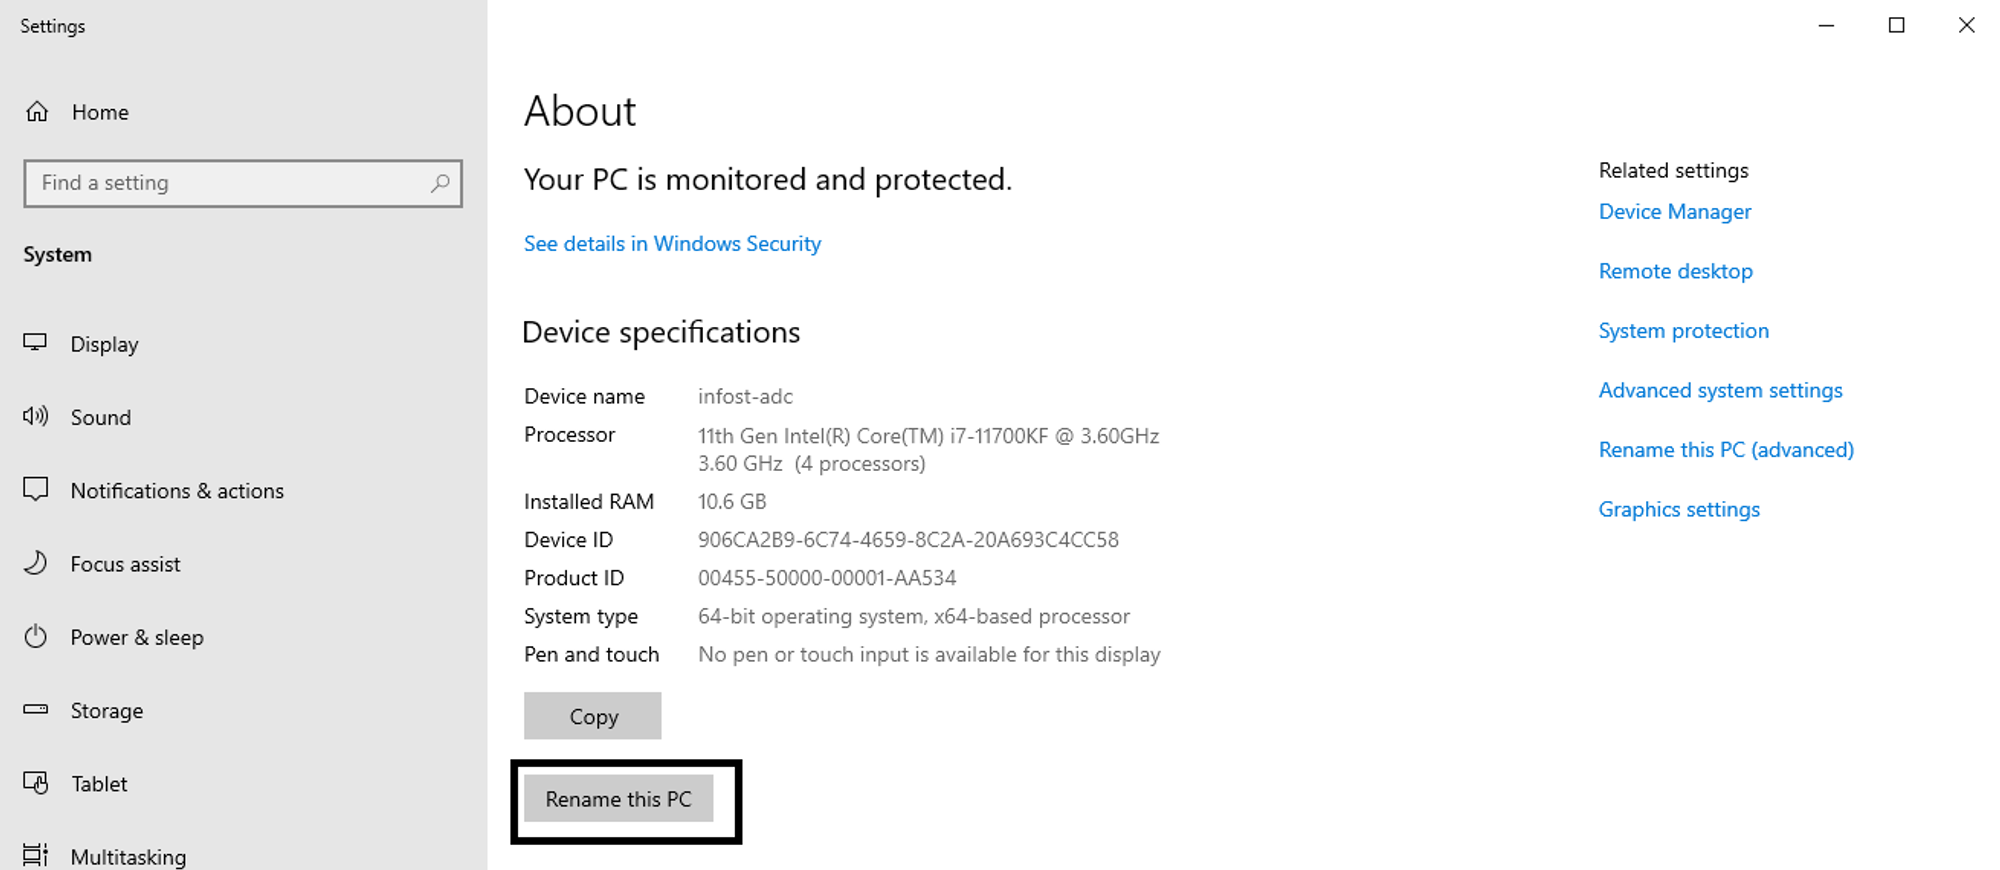
Choose a name that will make it obvious to yourself and others that this is a Windows Server with an Active Directory Controller. Feel free to restart now or later.
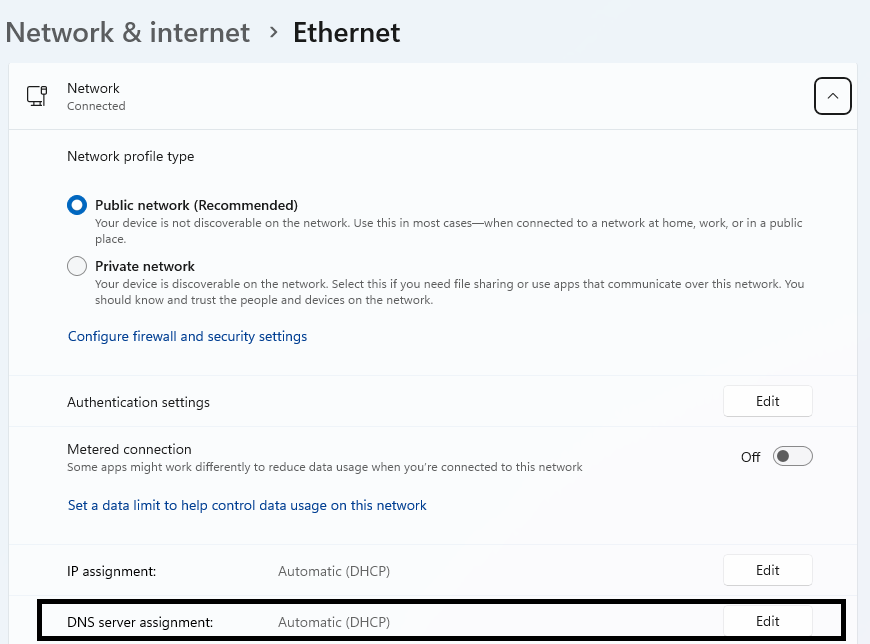
Next, it is important to assign a static IP address to the Windows Server because it is crucial to ensure consistent network access and reliable domain controller functionality with the network. This can be done by searching for Ethernet Settings, clicking on the option that appears, and then clicking on the Network button. This should lead you to a page that looks like the following:
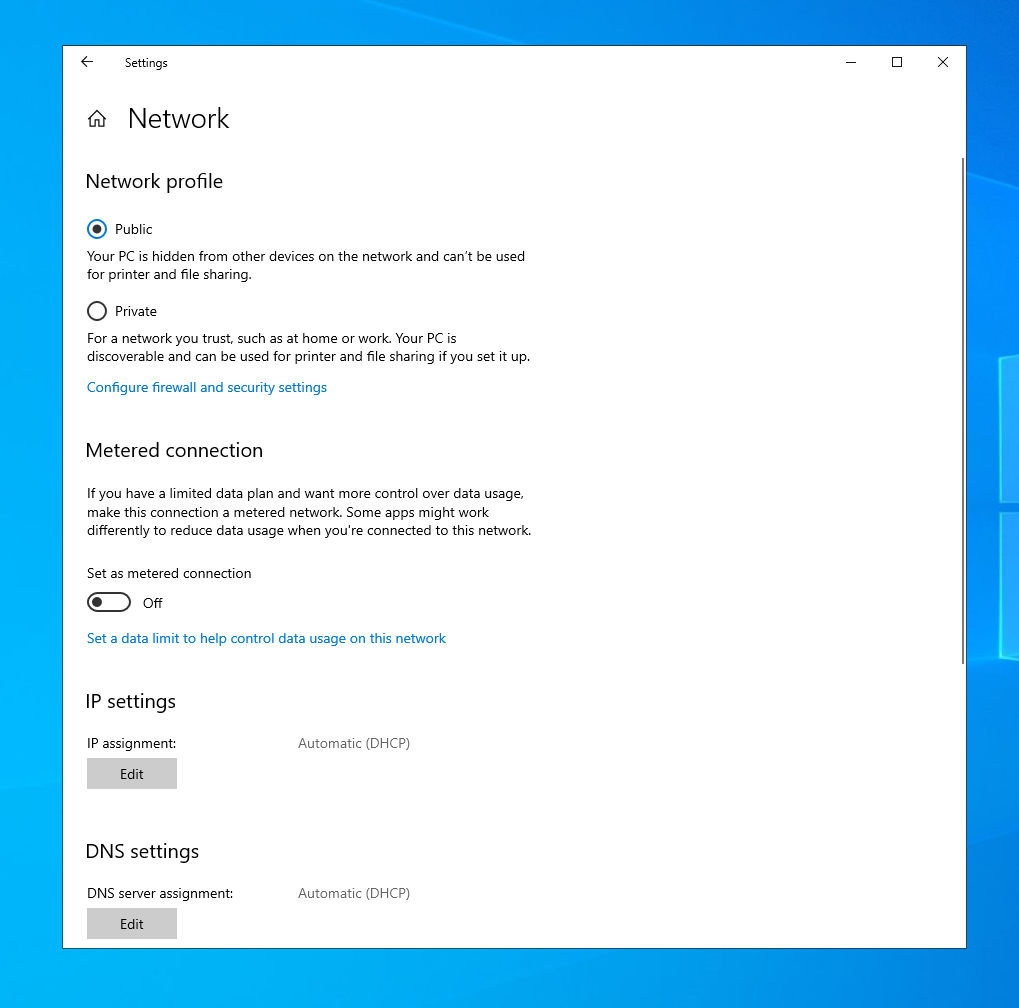
By selecting the Edit button underneath the IP Settings, we can select Manual, and then toggle IPv4. This will allow us to manually set a IPv4 instead of having it be done automatically by a DHCP server.
Before we insert anything, we must know what the current IP configurations are. This can be done by opening a Command Prompt, and running the command, ipconfig:
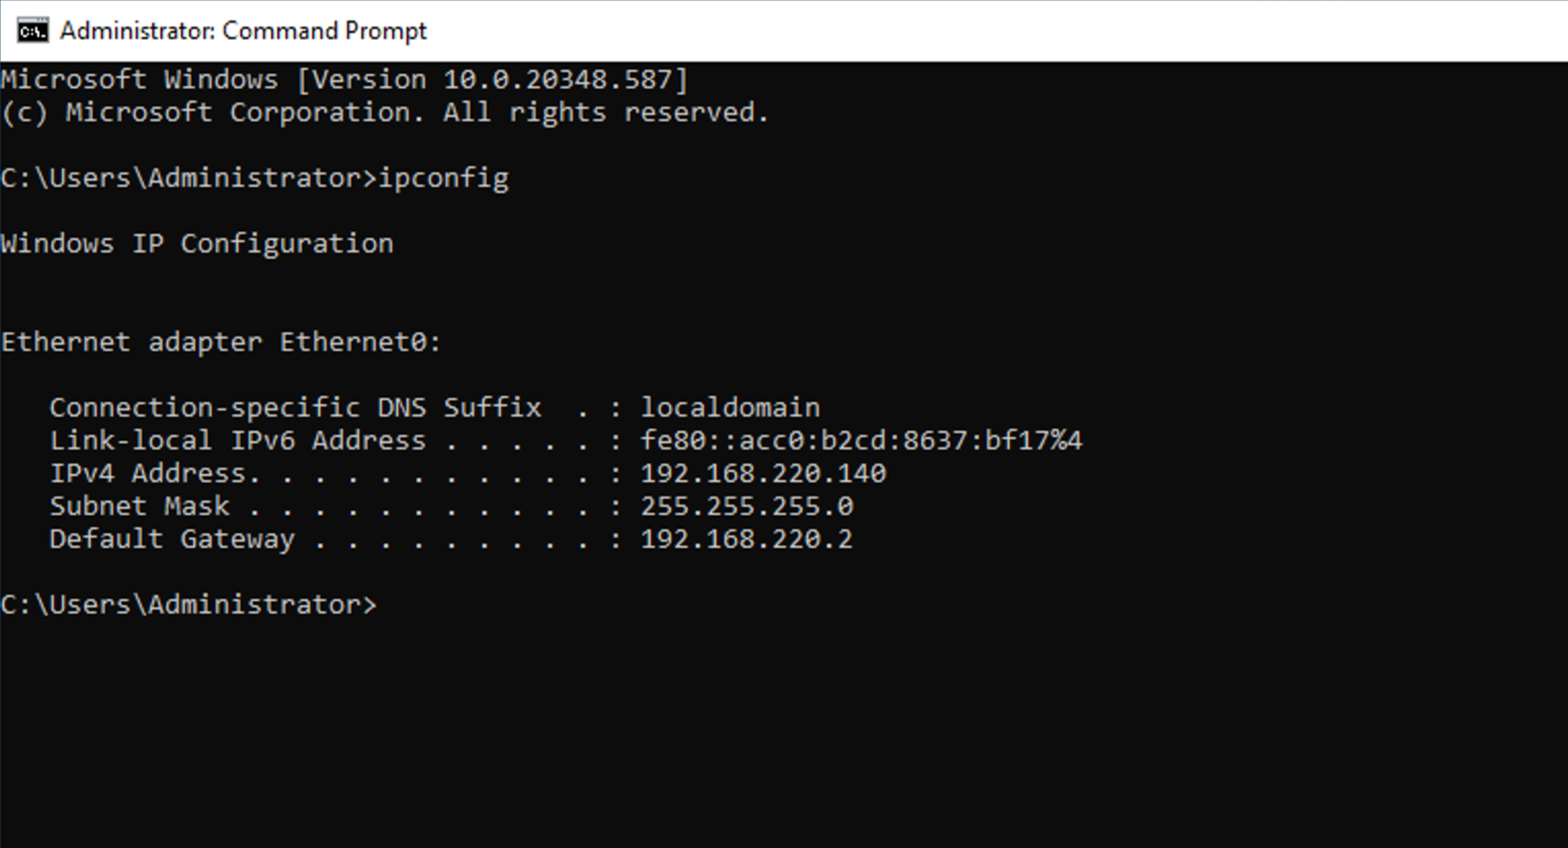
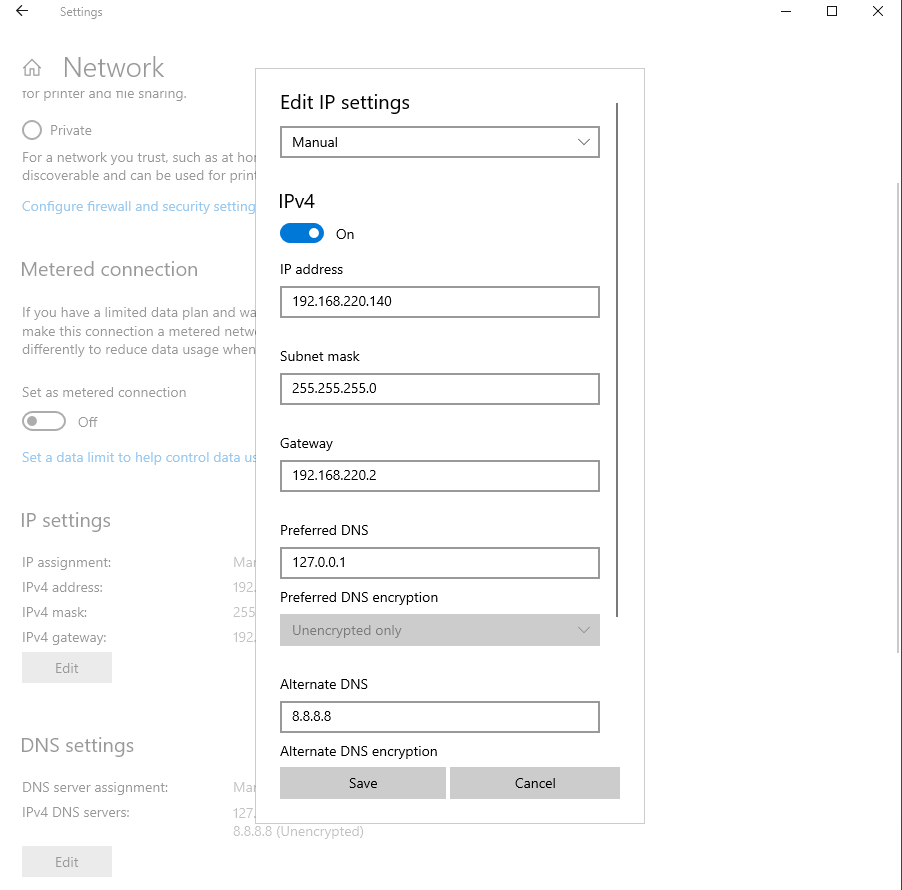
Note that your configurations will be different, but nevertheless, you will want to use the displayed settings to set your static IP manually. Also, you will want to set a Preferred DNS, and a Alternate DNS. These should be 127.0.0.1 and 8.8.8.8, respectively. This will allow your Windows Server to use its localhost as a DNS, and should it fail, it can use Google.com. All in all, your IP settings should look similar to the following (Again, not exactly the same to what the image displays, but to what your command prompt would display when running ipconfig):
We can then double check our configurations by using the Command Prompt to run ipconfig /all. This will not only display IP configurations, but also other configurations, like DHCP and DNS configurations:
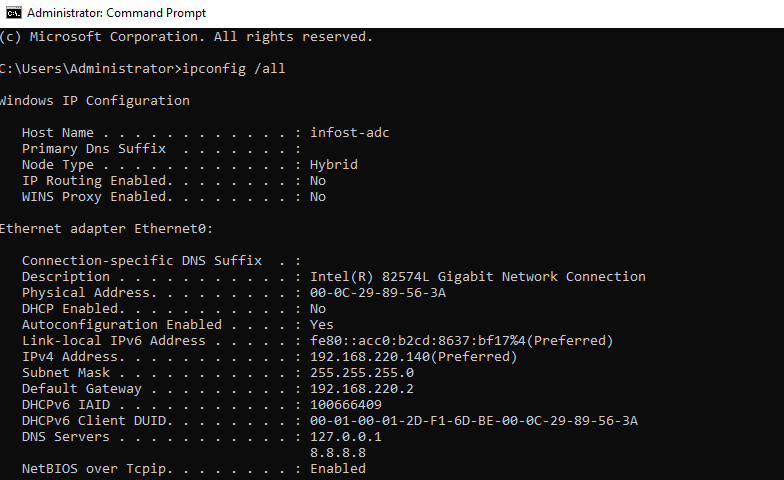
Note how DHCP is now not enabled and how we have two DNS servers configured
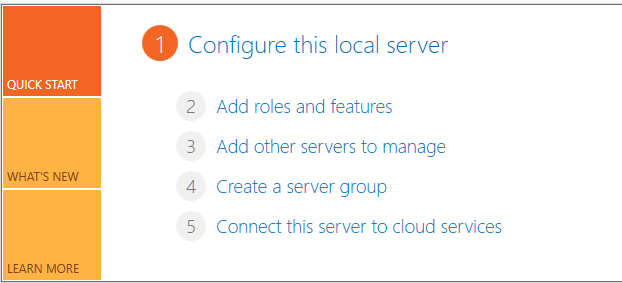
Now we can install Active Directory through the Server Manager. This should automatically open, but if it does not, search for it and open it. Server Manager is a comprehensive management tool in Windows Server that allows administrators to configure, manage, and monitor local and remote servers from a single interface. This makes installing features such as Active Directory relatively straightforward.
First we will click on Add roles and features, which will then open another window.
From here we do the following:
- Click Next
- Choose Role-based or feature-based installation
- Select the appropriate server (there should only be one available)
- Select Active Directory Domain Services
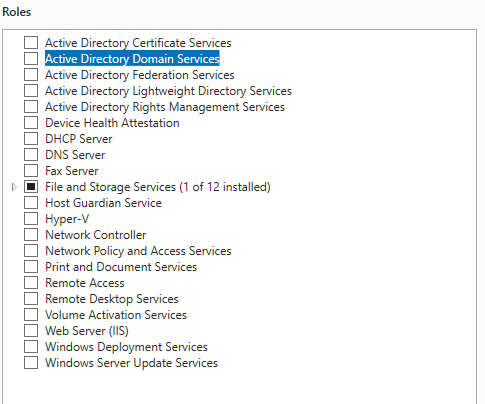
- Click Add Features
- Click Next
- Click Next
- Click Next
- Click Install
Now we wait until the installation finishes and we can click on Close.
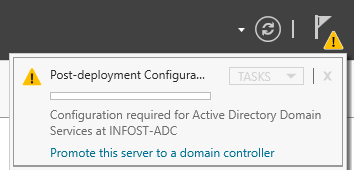
Although Active Directory is now up and running, it is not properly configured. To do so, back on the Server Manager, on the top right corner will be a flag with a warning sign. We simply click on it, and a pop-up window will appear, where we will click on Promote this server to a domain controller:
From here we do the following:
- Choose Add a new forest
- Specify the domain name (for this tutorial I chose infost.local for my domain)
- Click Next
- Set a password
- Click Next
- Click Next
- Verify domain name, click Next
- Click Next
- Click Next
- Click Install - Ignore Warnings
Once installation is complete the system will automatically restart.
You should notice that the login page looks slightly different, and the user includes the domain\User, which indicates that this system is now on a domain. Proceed to login in, and double check your DNS settings by using the Command Prompt and running ipconfig /all and reconfigure if need be.
Joining Windows 11 Pro VM to Domain
As we did before with the Windows Server Virtual Machine, would should rename the Windows VM to something more appropriate for easily identification and classification. To do so, use the search function to look for View your PC name. This will lead to an about page with an option to Rename this PC:
As before, feel free to restart now or later.
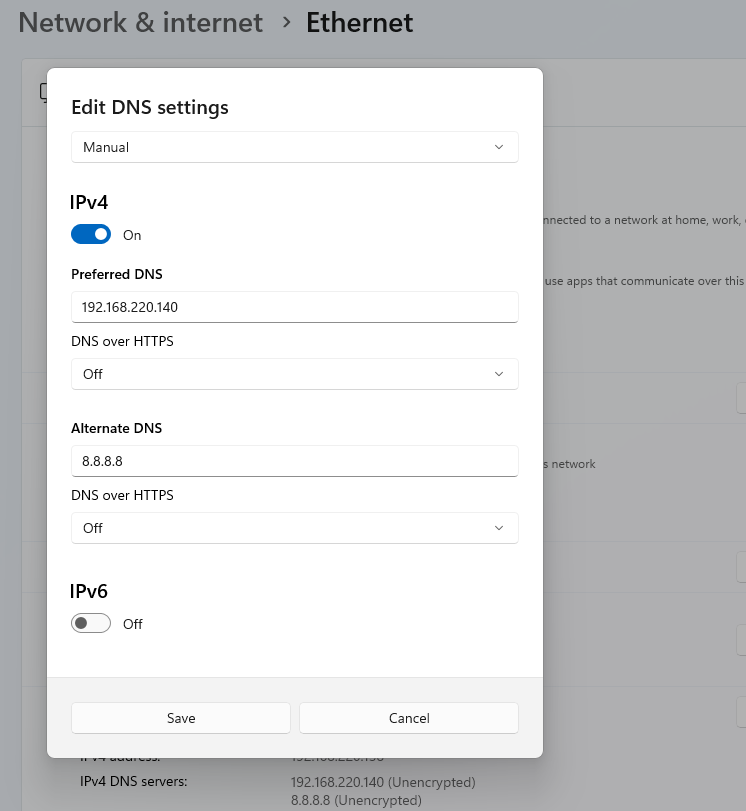
Next, we will configure the Windows 11 VM with a DNS that resolves to the Active Directory VM to ensure proper domain joining, authentication, and seamless network communication between the client and the domain controller. This can be done by searching for Ethernet Settings, and then clicking the Edit button on the DNS server assignment row:
We then select Manual, and then toggle IPv4 On, and add the corresponding IP address to both the Preferred DNS and Alternate DNS. The Preferred DNS **should point to your Windows Server VM IP, and the Alternative DNS can be the IP address for Google.com (Note that your configurations will not match exactly with the following image, but should be similar):
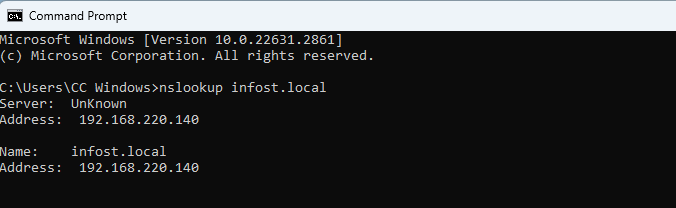
If we configured everything correctly, it should be possible to use a command-line tool like nslookup. Using nslookup on the Windows 11 VM can confirm connectivity to the Active Directory VM by verifying that the domain name resolves to the correct static IP address of the Active Directory server, ensuring proper communication between the client and the domain controller. So if we run **nslookup
Next, we can join our Windows 11 VM one of two ways:
- Traditional Domain Join (System Properties): Best for environments that rely on on-premise Active Directory infrastructure where extensive device management and policy enforcement are necessary
- Modern Management (Access work or school): Ideal for organizations using cloud services, offering flexibility and easier management, particularly suitable for remote or hybrid work scenarios
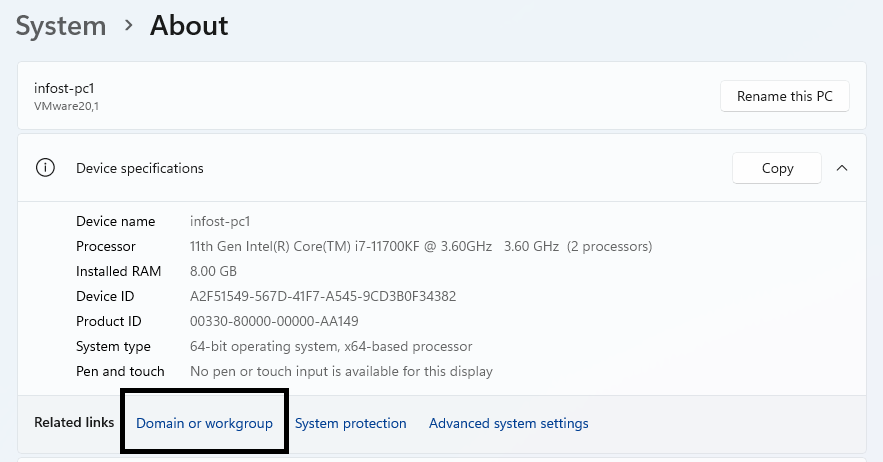
To gain more experience managing traditional domain functionalities, we will use Traditional Domain Join. This is possible in the same location that we changed the name of our PC, the About Page. Here we can find a button that allows us to configure the Domain or workgroup:
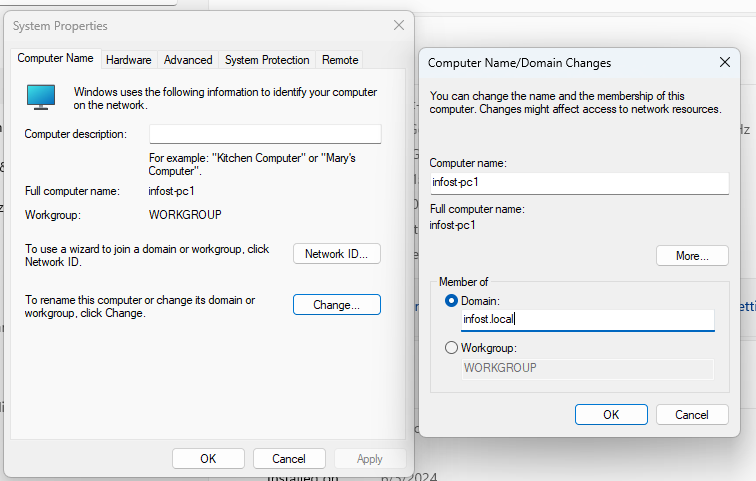
Then, we can click on Change, and then select from the radio menu, Domain. This should match the same domain that we established within the Windows Server VM:
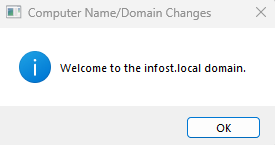
This will then prompt a login windows. Enter the appropriate credentials, and then you should be met with a pop-up window that welcomes you to the domain:
Create & Connecting Users Via Active Directory
When we installed Active Directory we also installed various administrative tools, such as Active Directory Users and Computers. In Active Directory Users and Computers, administrators can create and manage user accounts that serve as credentials for accessing resources within the network. By utilizing this tool, administrators can establish user accounts associated with specific permissions, ensuring secure access to network resources such as the Windows 11 VM. These created user accounts can then be utilized for authentication purposes, enabling users to log in to the Windows 11 VM and access the domain resources, thereby facilitating centralized user management and streamlined access control within the network infrastructure.
Active Directory Users and Computers can be found through the Server Manager via the Tools menu, or by simply searching for it via the search tool. Once this has been opened we can create a new Organizational Unit by right clicking on our domain:
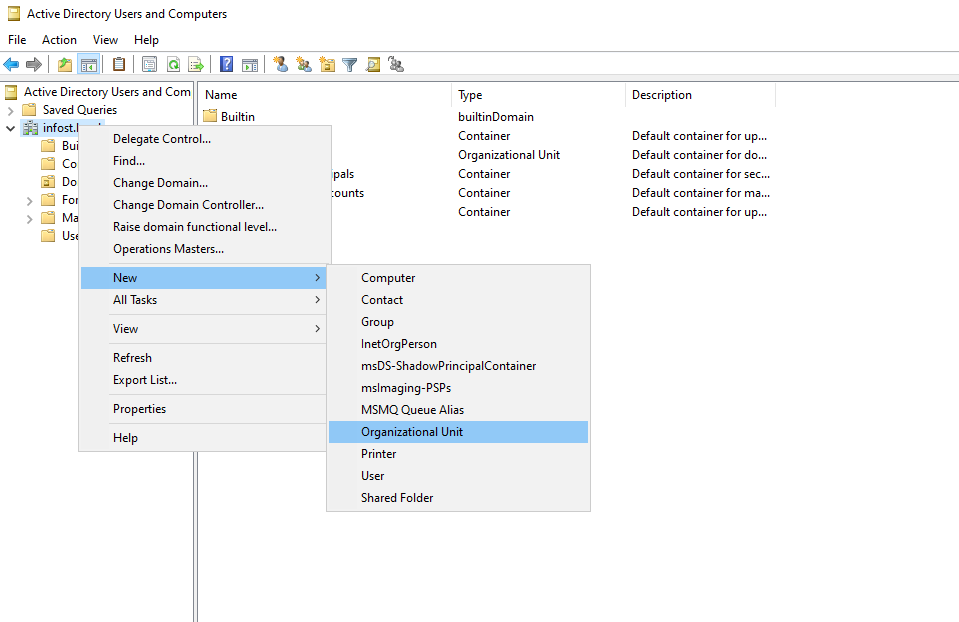
We can think of Organizational Units as folders, as they provide a logical structure for organizing and managing objects such as users, groups, computers, and other resources within a domain. For example, we can create a Admins OU to manage users that may be administrators.
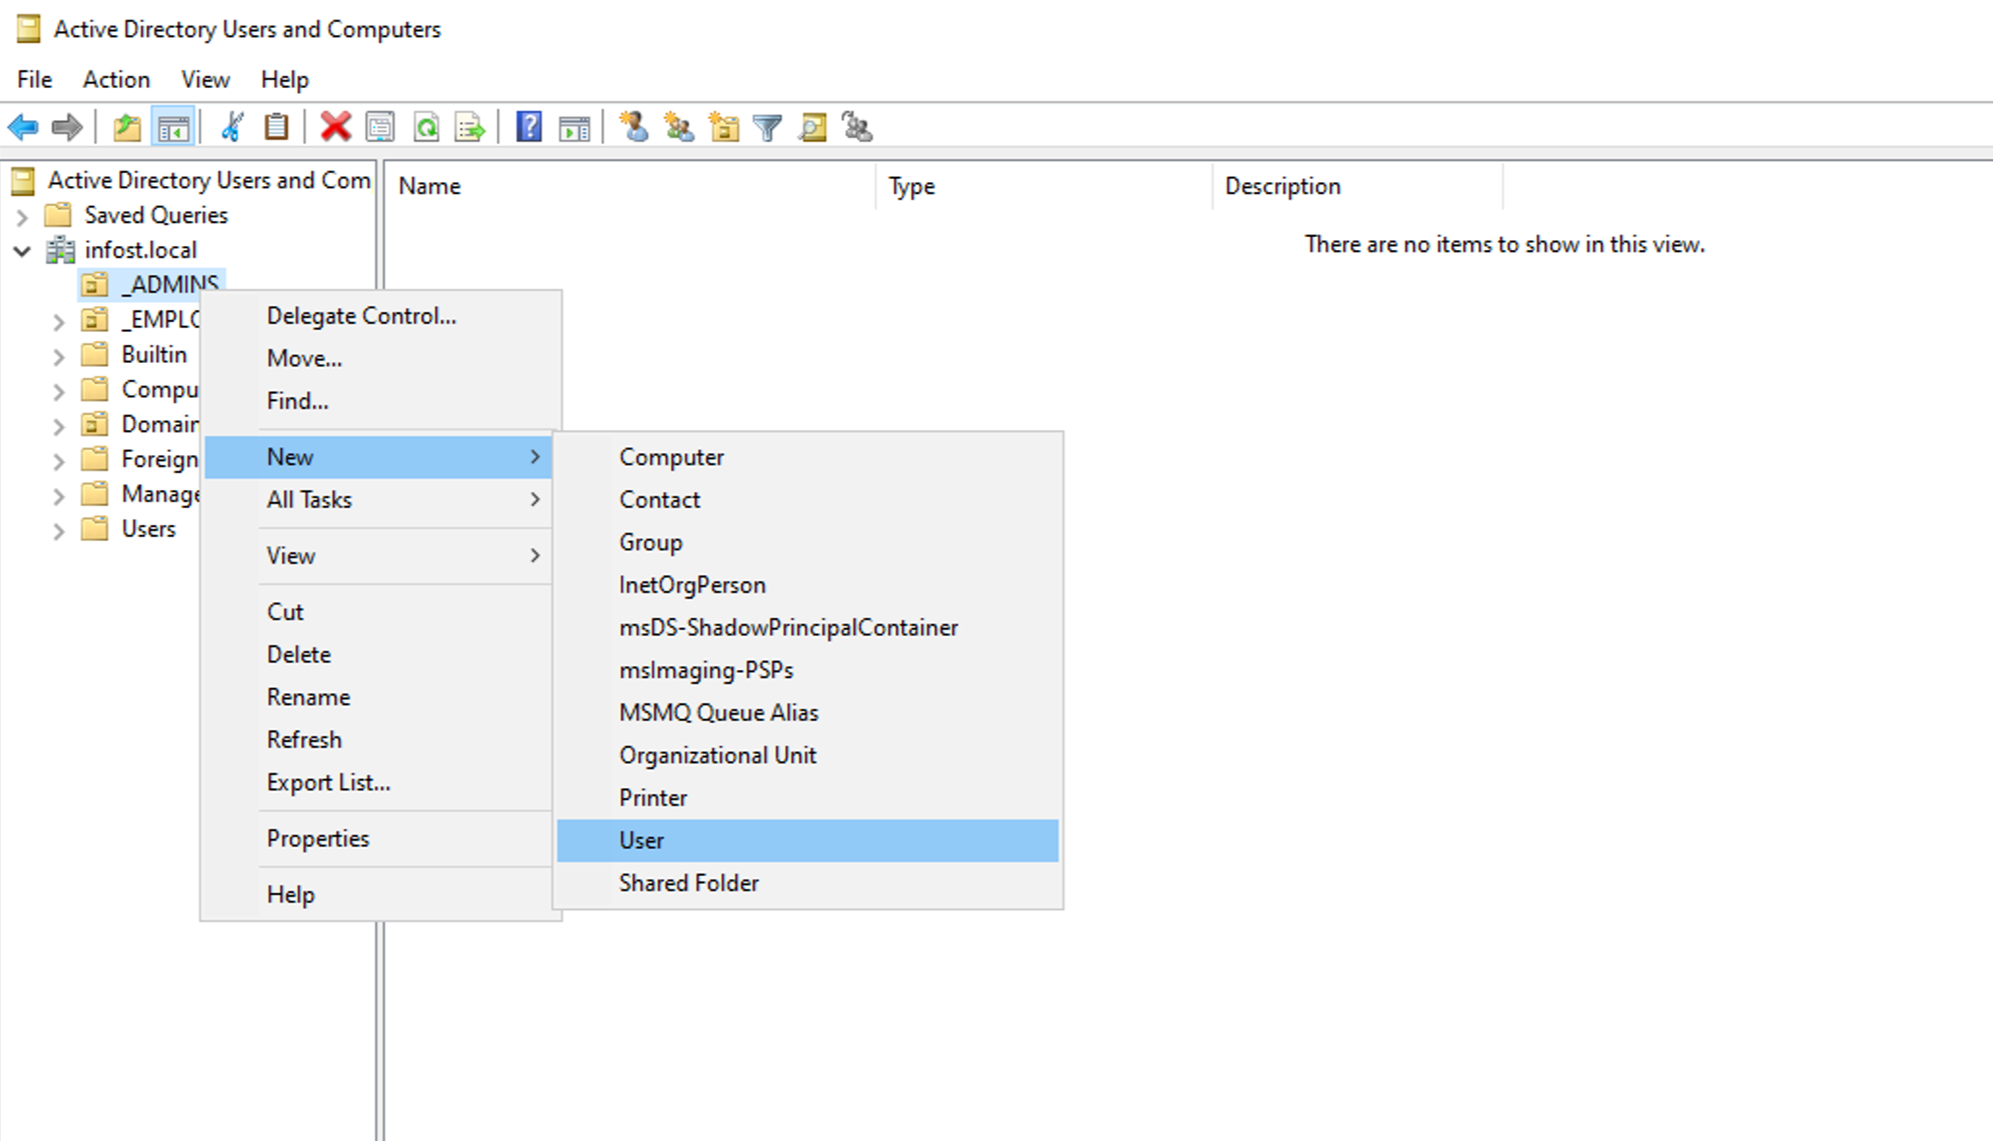
To create a User within a newly created OU, we simply right click the OU and click New and then User:
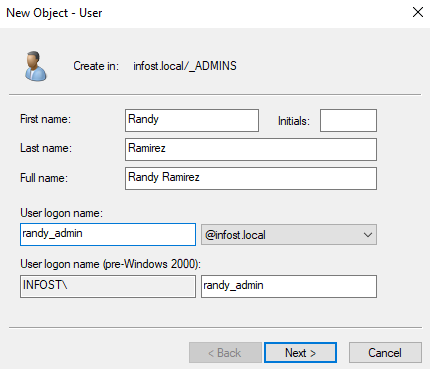
Next, we create credentials for the new User:
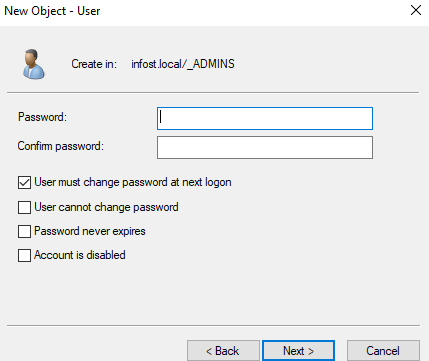
And set passwords for the same User:
Now we can properly add the created User to the Domain Admins Group by:
- Right-clicking the username
- Click Properties
- Click Member of tab
- Click Add
- Enter domain admins in text box
- Click Check Names
- Apply
- Ok
By Creating this User we are now able to login to the Windows Server VM with their credentials, and if we have joined the Windows 11 VM to the domain, we should be able to also access it with the same credentials.
We can even continue to setup new users in other OUs in our Windows Server **and try to access the Windows 11 VM with the new credentials. Because they are now joined in the same domain, we can easily do this.
Congrats! You have now installed and configured Active Directory Server and joined a Windows device to that same domain! If you are interested in learning about sharing files through Network Security Groups through a similar configuration, check out my Network File Sharing tutorial!